Shall we start? Before erecting cities and jungles full of wild animals and climbing plants, learn how to weave an average leaf or a flower petal first. You are wrong in case you think that it's not interesting at all, because there exist various kinds of flowers. Each of the flowers has it's own character feature which has to be reflected! Frank chamomiles, majestic roses, naive violets, impudent burdocks, and exquisite lotus… it's so difficult to list them all! Take a pick of your personal flower, find a proper bead color for it (your flower will be better dressed if you combine several colors), cut a 50-70 cm piece of wire. (Take into account that you will have to place beads in the middle of the wire so it will fold in two) And now without hesitation string 3 beads on the wire. From now on one of the utmost beads will be the top of your petal! Leave it in the middle of the wire and take a closer look at the other two beads. They definitely miss something when trying to look as a leaf. They miss "solidarity"! They are to be solid!
We are very close to a very difficult maneuver - you have to be very crafty. You have to pass one of the wire ends trough these two beads so it will move towards the other wire end, then tight it well pulling beads to the wire center (central bead). Follow the pictures in order not to mix everything up!

|
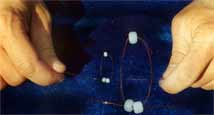
|
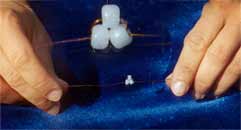
|
Now when you have two rows of beads (the first row of one bead and the second one of two beads) You can guess how to make your petal wider. Right! You just have to add beads one by one to the following rows. There will be three beads in the third row, 4 in the forth row, 5 in the fifth one, and so on. The method of weaving remains the same: you string the bead on one end of the wire and pass the other end trough all the stringed beads towards the firs one, and pull tight the row.
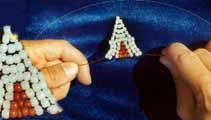
When you see that the petal become too wide and it's time to make it narrow, start to decrease the number of beads in the following rows one by one (10,9,8,… up to one bead).
We did it! But don't tear off or bind the wire ends. Let them rest for some time and they will help us again.
Now the first petal of your flower is ready!
My congratulations, little by little you start to become a Wizard. There's a nascent life in your arms! I saw many kids in my life, and I know that children's eyes shine most when their little owners start to do something good. Believe me! Look in the mirror - ain't it the eyes of the Wizard? EXACTLY! I tell it to you as a Fairy!
|
|
|
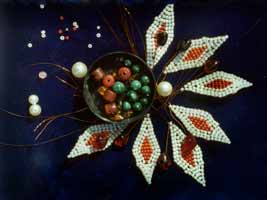
Well, the petals for the flowers are ready! Now we will need those free ends on each petal. Attention please! The beauty secret of your future flower depends on the free wire ends, which go out of two holes of each petal last bead. You will be able to string and then to bind one lovely or beautiful bead to each end. Quite possible that your Mon will allow to take them from her old necklace (Don't forget to ask for her permission!). These will be the stamens of your flower. Again… don't be sad if you cannot find big glass beads! For beginning any beads you like will do.
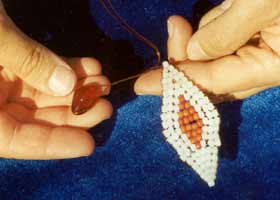
|
|

|
And the most exciting thing is to put everything together! Very soon your flower will come to life!
Take all the petals forming a good-looking circle. Keep stamen-beads inside the flower. They will be the center.
The simplest way to fix petals together in this position is to twist the wire in one direction very tight. Try to make it neat. You can use pliers.
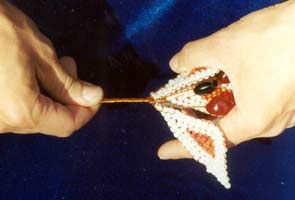
Set and twist into the right places of general stalk (you'll see where it is) your green leaves. Ensure they do not conflict with petals! Gradually the wire will start to grow thin, more and more wire ends will be twisted into stalk. Cut untidy wire ends at the end of the stalk with nippers.
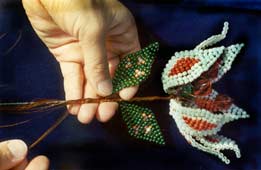
Now arrange the petals of the flower according to your own liking. They can be opened, closed, or whimsically curved.
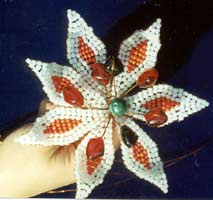
THE FLOWER IS READY!!!
There are more ways to join petals, but they are more difficult. Cope with this one for the moment! A little bit later I will tell you about these ways! Tell me what you can do and what you cannot - I like questions! But if sometime you flowers will have a fit of the blues send me their pictures. I think that the flowers of Miracle Meadow will gladly meet them! Just don't forget to tell me their names and age, so I wouldn't occasionally put some young flower together with the old boring flowers, discussing recipes of their fertilizers for the whole day!
And remember my dear, that there is just one short step from usual life to the beautiful fairy tale. You already did!!! So walk on, don't stop!!!
(Don't forget to do your lessons!)
SEE YOU LATER!!!
 |
 |
 |
 |